Planbookconnect
Contents |
Overview
All users of Planbook for Mac (and Windows) have access to a free, online service called [| PlanbookConnect]. PlanbookConnect is a service designed to take the plans you've entered into the desktop version of Planbook and make them available on the Internet for students, parents and other educators.
PlanbookConnect lets you sync your Lesson Plan Text, Assignments and Attachments. With PlanbookConnect, you have complete control over which fields in your plans are made available to the public. When you log in with your username and password, all of your plans will be available for you to view.
Creating a Free PlanbookConnect account
Before syncing your plans to PlanbookConnect, you must first create a free account. Please [| create an account].
Once your account is created (you'll get an email confirmation), please return to the desktop Planbook application.
Syncing your Plans for the First Time
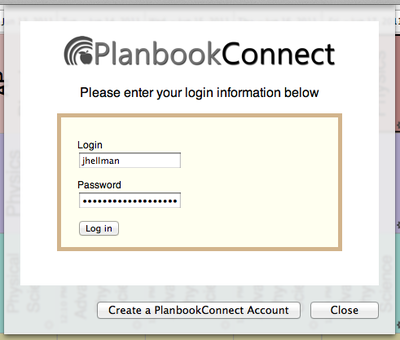
After you've created your PlanbookConnect account, you can use the File--Sync All To PlanbookConnect menu item to sync the plans in your file to PlanbookConnect. After pressing the appropriate menu item, you will be presented with a window asking you to log in to the account you've created (shown below). Enter your credentials (recalling that you username is not your email address).
After logging in correctly, you will be directed to close the sync window and select the File-->Sync All To PlanbookConnect menu item. You will only need to go through this login process again if you close and reopen your file.
Improving this workflow is on the Planbook 3.x todo list.
As the sync begins, you can track the progress of the sync in the bottom right corner of the main Planbook window. Depending on your network speed, the first sync may take a long time. If you have large files attached to your lesson plans, the sync may take a very long time. Please don't close Planbook while the sync is progressing.
Syncing Plans After Making Changes
After making changes to your plans, you can sync only the plans that have changed. To do this, choose the File-->Sync Updated to PlanbookConnect. This will save time and bandwidth and it's recommend you choose this option rather than syncing all plans when possible.
Managing the Sharing Settings for your Lesson Plans
Accessing Your Sharing Settings
After syncing your plans, you will want to visit [| PlanbookConnect] with a web browser and [| login]. After logging in, you'll want to select the parts of your Planbook you'd like visitors to be able to see. Remember, you will always be able to see all of your entered plans when logged in, regardless of the sharing settings you select for visitors.
Please visit the Sharing Settings link at the top right corner of the web page to manage your sharing settings. The management links found in the top right corner of the web page are shown below. These links will not appear unless you're logged in.
Directing People to your Page
There are two easy ways to get people to visit your page:
- Distribute the URL for your particular PlanbookConnect page. Your URL is of the form: http://www.planbookconnect.com/teachers/username where you must replace username with the username you chose when signing up. My account is found at http://www.planbookconnect.com/teachers/jhellman
- Direct visitors to http://www.planbookconnect.com and have them use the search field to find your page.
The Sharing Settings web page includes a section (shown to the right) that enables you to choose which courses in your Planbook are shared with others.
To control the courses that are made public, toggle the checkboxes to indicate the sharing status of each course.
Once you have selected the courses you'd like to share, be sure to apply your changes.
By default, all courses are shared.
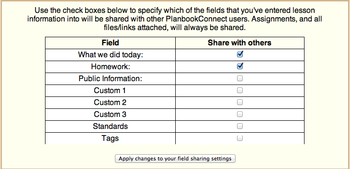
You'll also have the opportunity to choose which fields you'd like to share.
To control the fields you'd like to share, toggle the checkboxes next to the field name.
Assignments (and their attachments) are always made public.
Files and links are made public based on the publish setting you enabled in the Desktop version of Planbook. See Attaching Files and Links for information about managing publish settings.
The lesson title is always always visible.
If you plan far into the future using the Desktop version of Planbook, your future lesson plans will also be available on [| PlanbookConnect]. To control how far in advance visitors can see your plans, choose the appropriate setting. You have six options:
- Share all lessons.
- Share lessons on or before today.
- Share lessons on or before tomorrow.
- Share lessons before the end of the week.
- Share lessons before the end of next week.
- Share lessons before the end of the month.
Remember, that regardless of this setting, you will be able to see all of your plans when logged in.
Directing Visitors to your Site
There are two easy ways to direct students, parents or other interested people to your PlanbookConnect site:
- Send visitors directly to your PlanbookConnect page. Your URL has the form: http://www.planbookconnect.com/teachers/username where you replace username with the username you chose when creating your account. My page, for example, is found at http://www.planbookconnect.com/teachers/jhellman
- Send visitors to the main PlanbookConnect homepage, http://www.planbookconnect.com, and direct them to search for you or your school.


