Export
Contents |
Overview
Many teachers have different classes each year, but it's not uncommon to repeat a course or two from year to year. Planbook lets you export a course (or a part of a course) to a file that can be imported back into a different Planbook file. This feature can also be used to share a course with another teacher.
Planbook also lets you export a unit for use in a different course or a completely different file.
Exporting a Course
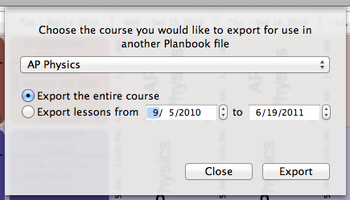
To export a course, choose the File-->Export Course menu item. After selecting the menu item, a dialog will appear asking you to choose:
- Which course to export.
- The range of dates to export
The default is to export the entire course, but by changing the dates you can select a subset of your course for export.
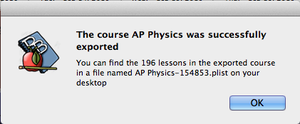
Clicking the export button will result in a file being saved to your desktop containing the lessons that you selected for export. This file is readable only by the import feature in Planbook.
Exporting a Unit
Planbook also allows exporting the lessons in a unit, rather than all the lessons in a course. To export a unit, you must first open the Units Manager using the Tools-->Units Manager menu item.
Once you have the unit manager open, you can export a unit by selecting it in the left table and clicking the Export Unit button.
The unit will be exported to a file on your desktop and a dialog will appear showing you the name of the file created.
Importing Lessons
Regardless of whether you've exported a course, a range of dates within a course, or just a unit, the process for importing lessons is the same.
First, select the File-->Import Lessons menu item. Immediately, you'll be asked to locate the file you'd like to import. Remember that Planbook places exported files on your Desktop for easy recovery.
After selecting the file you'd like to import, Planbook will present a window asking for some details about how you'd like the lessons imported.
Importing to a New Course
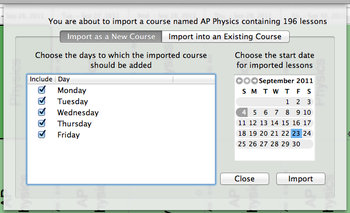
The first option is to import lessons into a brand new course in Planbook. Choosing this option will result in Planbook creating a new course name matching the name of the exported course. If that course name already exists in your file, Planbook will modify the name of the imported course to avoid conflicts.
You also have the opportunity to select a date for the import to begin.
Since you are creating a new course, you have the ability to choose the days of your rotation or week that the course is added to.
Clicking the Import button will result in the course being created and the lessons contained in the selected file being inserted, beginning at the selected date.
Importing to an Existing Course
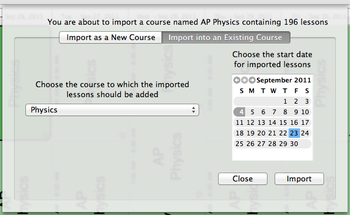
Planbook also lets you import lessons into an existing course.
In this case, the lessons in the file you selected will be placed into the course of your choosing. Existing lessons in the course will be rewritten with the lessons you've selected for import.


