Html options
Contents |
Overview
If you plan on publishing your lesson plans to your own website, you'll want to customize what's published and shared with the world. All of the options for publishing are contained in the Tools-->Publish Setup menu item. Please note that the publish options contained here do not impact PlanbookConnect publishing.
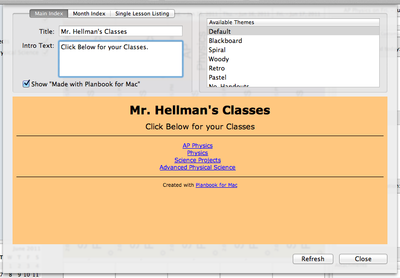
After opening the Publish Setup window, you'll be presented with the following window. The rest of this page will discuss the options found within.
Choosing a Theme
Planbook offers a number of themes for your published output. You are welcome to choose any of the themes from the available themes table. Changing the theme is as easy as selecting a new theme from the list. The preview at the bottom of the screen will instantly update to reflect these changes. An internet connection is required to preview themes.
Modifying the Published Output
Planbook publishes three types of pages to your website. First, Planbook creates a landing page that lists all your classes. Planbook also generates a monthly calendar showing the lesson titles for each month you teach. Finally, Planbook generates pages for each of your lessons. All of these pages have customizable options.
Modifying the Landing Page
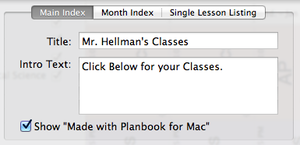
Planbook offers two customizations for the landing page. You can edit the title and a sub-heading for this page.
To enter a new title for your page, simply type a title into the title field. I recommend something similar to what is shown in the image to right, obviously customized for your classes.
You can also enter a subheading and it can be helpful to direct less technical users of your website to click on the links below to access your classes (again, shown to the right).
To preview these changes, you will need to click the Refresh button in the lower portion of the Publish Options window.
Modifying the Month Page
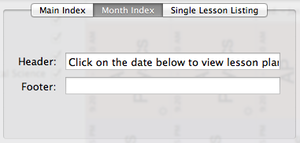
The second type of page that Planbook publishes is a monthly listing of your lessons in each class. To edit this portion of your publish output, switch to the Month Index tab.
You can enter a header and a footer for this page. The header is displayed just above the month calendar and the footer just below. To edit each of these, simply type into the text fields.
If you don't enter lesson titles, it can be a bit unclear where to click to access the entire lesson plan. A header directing users to click on the date below can be a helpful hint.
To preview these changes, you will need to click the Refresh button in the lower portion of the Publish Options window.
Modifying the Lesson Page
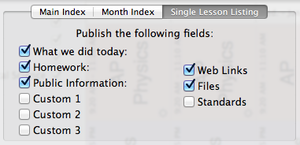
You can modify the lesson fields that are published using the "Single Lesson Listing tab.
Once you switch to the Single Lesson Listing tab, you'll see checkboxes next to the names of all your lesson fields, as well as for Web Links, Files and Standards. You can choose to publish these fields, or not, based on the status of the checkbox.
If you choose to publish web links and/or files, Planbook will only publish the Web Links and Files marked for publish. You can still keep tests and other private documents private. For more information about modifying publish settings, please see Attaching Files and Links.
If you change the fields for display, you will need to re-publish all of your lesson plans for the changes to take effect.


